 Ted Tschopp
BLACK RAIN DELIVERY
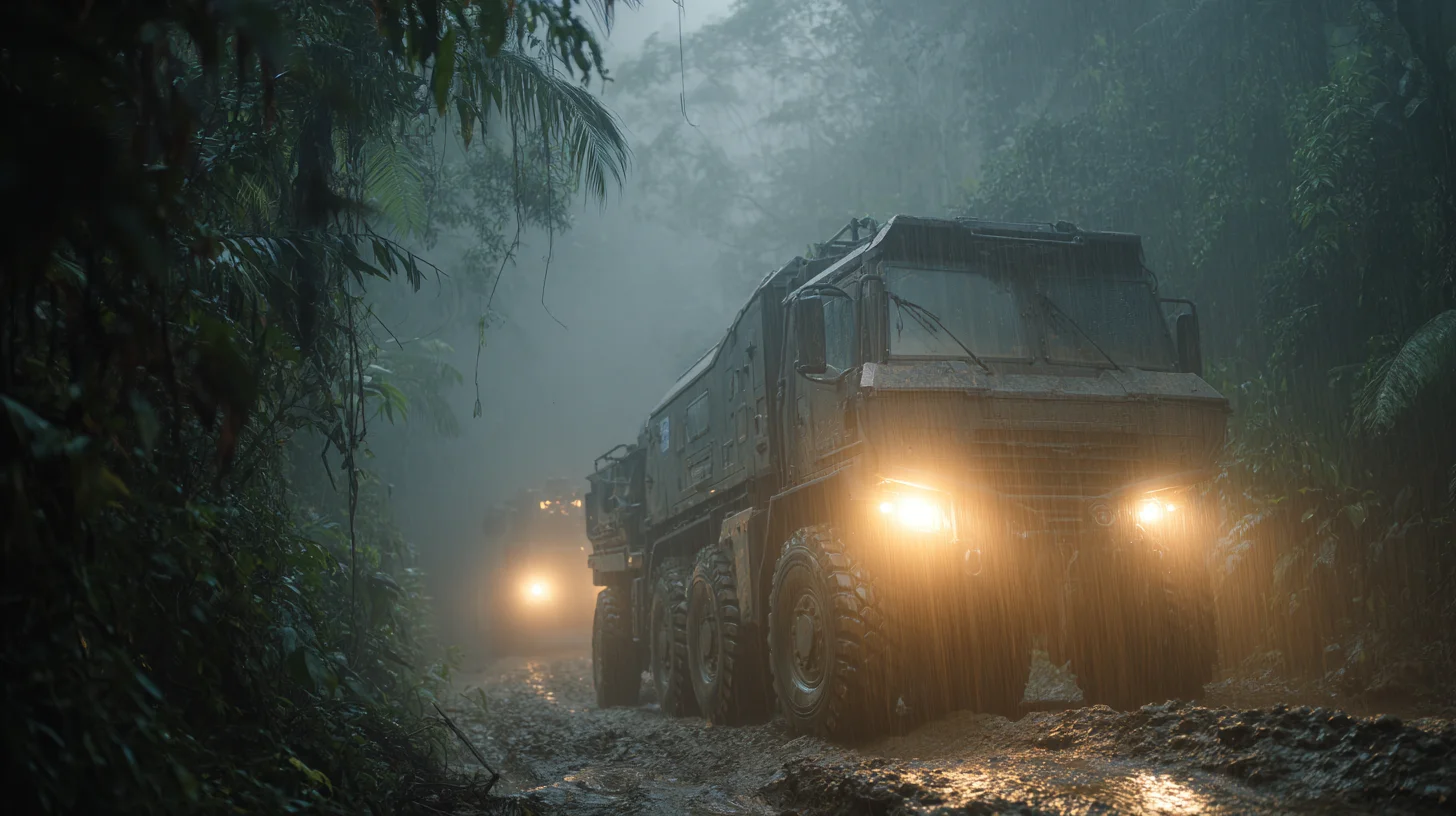
Four battered haulers. Four unstable coffins. One jungle road. The job only gets easier if you stop caring who survives.
Design Brief (Recap)
- Tone & run type: Cinematic, high-tension delivery run under relentless pressure
- Setting: Deep Amazonia, where old roads, corporate extraction, awakened wilderness, and insurgent networks overlap
- Key factions: Aztechnology through a deniable logistics front, local resistance, smugglers, corporate cleanup assets, and an awakened storm intelligence
-
Themes:
- Desperation and survival against the odds
- Double-crosses and betrayal
- Brotherhood and trust under pressure
- Small people caught in systems that treat them as expendable
- Spotlight: Combat, social play, legwork, Matrix action, magic, and vehicles all matter
- Scope: 4 sessions, tight objective structure, visible clocks, meaningful side objectives, and consequences that can outlive the main run
Premise & Overview
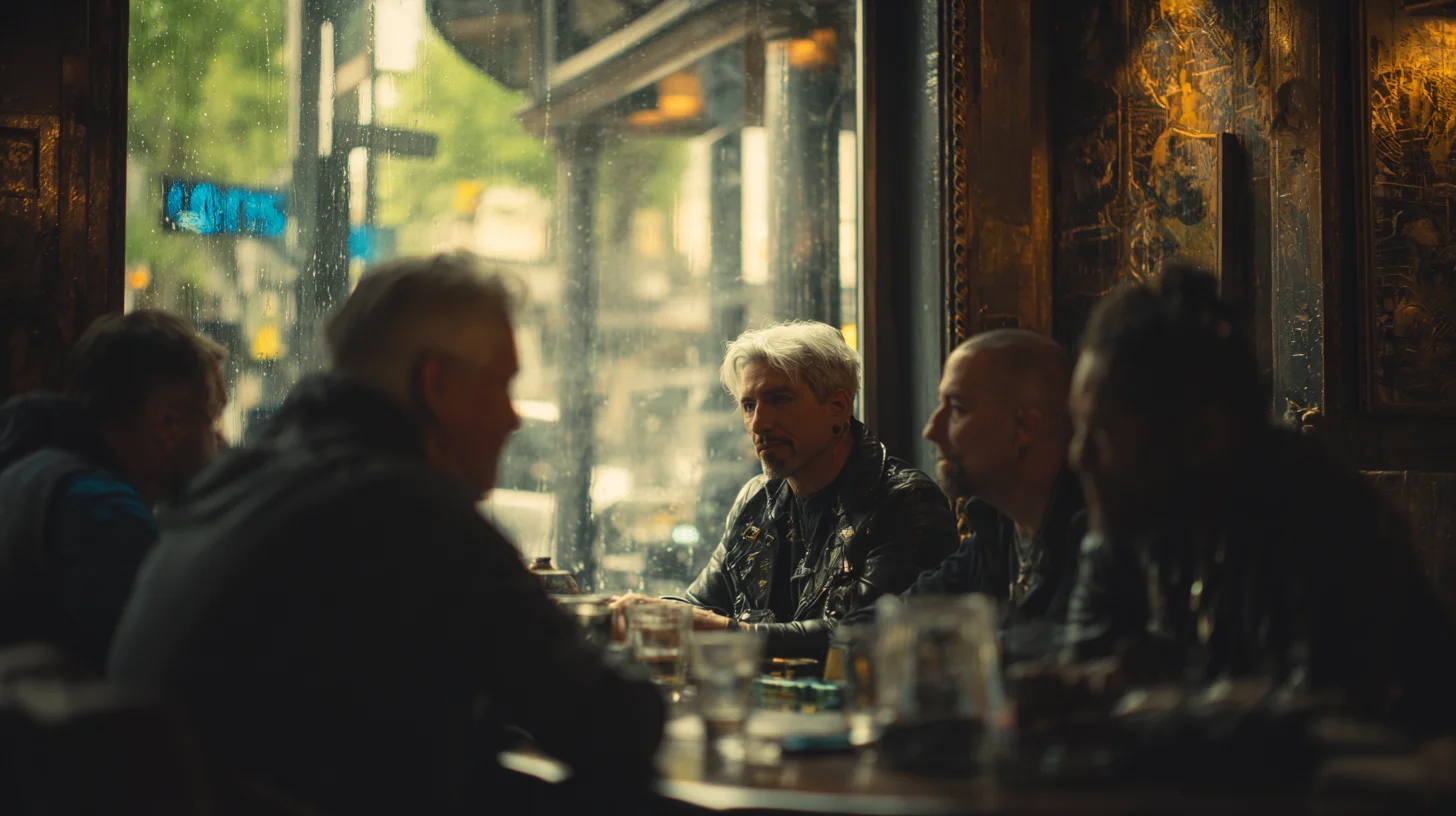
The runners are hired in Puerto Exilio, a humid, half-legal frontier port on the outer edge of Amazonian war country. A polished corporate intermediary named Matías Varela offers them a blunt contract: transport four coffin-sized canisters of a substance called Tlaloc Black from Puerto Exilio to the remote San Telmo PetroThaum Field before a closing weather and containment window makes the site unrecoverable.
The official story is ugly but simple. San Telmo hit a bad pocket during petrothaumic extraction. The site is burning, the breach is unstable, and Tlaloc Black is the only compound that can collapse the rupture before the entire field goes up. Aircraft cannot carry it safely. Drone haulers trip its instability profile. Rail lines are dead. The only workable option is a convoy of old, heavily modified road rigs driven by people desperate enough to say yes.
The truth is worse. San Telmo did not merely puncture fuel, gas, or chemicals. It broke into an awakened watershed nexus known on old maps as the Sleeping Mouth. Tlaloc Black really can seal the wound and save the site in the short term. It can also permanently scar the spring beneath it, poison nearby runoff for years, and give Aztechnology an excuse to militarize the region under “emergency containment.” The resistance knows something terrible is moving through the jungle. They do not know every detail. The jungle itself knows more than anyone is admitting.
The runners are not the best team for the job. They are the team that can be denied afterward.
Background & Faction Agendas
Amazonia is the ideal Shadowrun answer to a Sorcerer-style run: hostile roads, exhausted infrastructure, tropical weather that becomes a character in its own right, corp extraction sites built on older wounds, and long stretches where nobody is coming to save anyone.
What happened at San Telmo
Months ago, Aztechnology’s frontier contractor Peregrino Logistics reopened an abandoned petrochemical corridor and began “survey drilling” at the San Telmo site. In truth, they were harvesting petrothaumic compounds from an awakened subterranean reservoir: a hybrid resource play involving industrial chemistry, mana-sensitive fluids, and geomantic mapping.
Then the drills broke through the wrong layer.
Since the breach:
- Rain near San Telmo sometimes falls black and oily for minutes at a time.
- Vehicle electronics stutter along the route.
- Spirits tied to weather and root systems have become restless.
- Nearby settlements have been evacuated, coerced, or quietly abandoned.
- Internal Aztechnology teams are now treating the site as both a crisis and an opportunity.
Aztechnology / Peregrino Logistics
What they want:
- Tlaloc Black delivered intact and on time
- The San Telmo field preserved
- The breach collapsed before it becomes a public disaster
- Control of the Sleeping Mouth secured under emergency authority
Why now:
- The containment window is closing
- Internal corporate rivals are already circling
- Too many locals know something is wrong
- The site still contains valuable equipment, research, and trapped personnel
How they conflict with others:
- They need deniable outsiders, but outsiders create witnesses
- They want the runners to succeed, but only on Aztechnology’s terms
- They prefer survivors who can be bought, frightened, or buried
Local Resistance
This is not one organization. It is a shifting network of local defenders, former workers, smugglers, eco-awakened activists, and insurgent cells. They agree on one thing: when a corporation says “stabilization,” it usually means “seizure.”
What they want:
- Stop the delivery, steal it, or change its purpose
- Keep the watershed from being permanently scarred
- Protect local communities from both San Telmo and the response to it
Why now:
- The convoy is in motion
- The site is close to a point of no return
- They do not have the firepower for a clean assault, so they need leverage
How they conflict internally:
- Some want negotiation
- Some want the cargo destroyed
- Some would rather let San Telmo burn than save a corporate asset
Smugglers and Frontier Operators
They live between flags. They know every fuel cache, washed-out road, and checkpoint where a smile is cheaper than ammunition.
What they want:
- Profit
- Access
- Influence
- Survival
How they complicate the run:
- They will absolutely sell information
- They will also absolutely sell discretion
- Often to different buyers
The Rain That Watches
The watershed around the Sleeping Mouth has awakened into a persistent intelligence: not exactly a free spirit, not exactly a genius loci, but something old enough that modern categories feel clumsy.
What it wants:
- The wound closed without annihilating the spring
- Balance restored
- The bearers of Tlaloc Black judged by what they choose to save
How it acts:
- Windshield reflections
- Voices in roof-drumming rain
- Sudden pressure changes
- Unhelpful but meaningful warnings
Adventure Hooks
Use one, or layer several for a stronger start.
1. Fixer’s Last Favor
A trusted fixer tells the team this is a once-only payday and a probable death sentence. They do not oversell it. They just say the money is real and the road is worse than the briefing.
2. Debt With Teeth
One runner, a contact, or the team’s usual mechanic owes the wrong people. Clearing the debt requires taking this contract.
3. Someone Is Trapped at San Telmo
A contact, former coworker, or low-level wage slave the team actually likes is stuck at the site. Saving them is not the job, but it becomes a reason the job matters.
4. Specialist Work
Varela explicitly wants a deniable team with breadth:
- a wheelman or rigger to keep the convoy alive,
- a decker to spoof route tracking and field systems,
- a mage or shaman because the cargo has “astral side effects,”
- and someone who can negotiate when the bullets pause.
Plug-and-Play Character Hooks
Use these on the fly for convention tables:
- Decker: one relay signature on the route matches an old employer or previous target
- Mage: the cargo’s aura feels like a wound pretending to be a tool
- Rigger: one of the trucks once belonged to a legendary smuggler everyone in the corridor knows by name
- Face: Rosa “Switchback” Ibarra knows your reputation and trusts you slightly more than the others
- Street Sam / Merc: Héctor Grimm fought in the same theater as someone you knew
- Any PC: someone at San Morado or San Telmo owes you, or you owe them
Key NPCs
Matías Varela — Johnson / Crisis Broker
Concept / Archetype: Polished Aztechnology troubleshooter hiding behind a logistics front
Appearance & Mannerisms
- Crisp suit in crushing humidity
- Silver umbrella, polished boots, no visible sweat
- Speaks softly, never rushes, never repeats himself
Motivations & Secrets
- Wants the cargo delivered intact and on deadline
- Knows people at San Telmo really will die if the site fails
- Also knows the delivery plan will permanently damage the watershed
- Has already retained a backup recovery team to retrieve cargo or silence witnesses
How to Portray
- Quiet certainty
- Makes every threat sound administrative
- Never loses his temper; disappointment is more dangerous
What He Offers / How He Complicates Things
- Money, access, route papers, starter gear, and a reason to move now
- Later pressures the team through comms, payment threats, and misinformation
- If crossed, becomes a patient, well-funded enemy
Useful line: “I am not paying for courage. I am paying for delivery.”
Rosa “Switchback” Ibarra — Smuggler Guide
Concept / Archetype: Frontier route broker who survives by being useful to everyone
Appearance & Mannerisms
- Patchwork rain poncho over armored road leathers
- Silver tooth, old route tattoos, cracked mirrored lenses
- Constantly chewing stimulant gum; always watching mirrors, culverts, and tree lines
Motivations & Secrets
- Wants to get rich without becoming famous
- Knows at least three alternate routes and which ones are currently lies
- Has sold route fragments to multiple parties
- Does not actually want the runners dead; dead clients stop paying
How to Portray
- Fast smile, faster deflection
- Always sounds half-amused
- Makes betrayal sound like weather
What She Offers / How She Complicates Things
- Shortcuts, local knowledge, smuggler contacts, spare parts, and hidden caches
- Her divided loyalties can bring rivals or rebels down on the convoy
- Can still redeem herself if treated like a person instead of a disposable guide
Useful line: “The road’s honest. People aren’t.”
Captain Izel Kaapora — Resistance Field Commander
Concept / Archetype: Tactical insurgent leader who is tired of corporate euphemisms
Appearance & Mannerisms
- Matte jungle cloak over practical combat kit
- Scar along one jaw, quiet eyes, immaculate field discipline
- Says little, notices everything
Motivations & Secrets
- Wants the cargo stopped or repurposed
- Cares about the watershed and the people displaced by San Telmo
- Is not eager to kill the runners if they can be turned
- Knows enough about the site to suspect Aztechnology is lying, but not enough to solve it alone
How to Portray
- Controlled, direct, never theatrical
- Speaks like someone used to being obeyed because she’s usually right
- Offers hard truths, not warm comfort
What She Offers / How She Complicates Things
- Ceasefire options, safe passage, scouts, and a possible alliance
- If ignored or betrayed, becomes the sharpest pressure on the route
- If convinced the team is more than hired muscle, she can become crucial to the best ending
Useful line: “I don’t need heroes. I need you to stop being useful to them.”
Dr. Lucía Tenorio — San Telmo Chief PetroThaum Engineer
Concept / Archetype: Corporate engineer with a conscience and no clean exits
Appearance & Mannerisms
- Soot-streaked lab jacket over emergency tac vest
- Tired eyes, clipped speech, hands stained with chemical sealant
- Keeps finishing other people’s sentences because she is already three problems ahead
Motivations & Secrets
- Wants to save the workers and prevent total breach collapse
- Knows Varela’s deployment plan is the fastest, not the cleanest
- Knows Tlaloc Black can be retuned into a less destructive solution
- Has family or dependents in corporate housing and cannot simply defect without consequences
How to Portray
- Brilliant, exhausted, morally cornered
- Speaks like someone trying to sound clinical because emotion would break the dam
- Never asks the runners to trust the corporation; asks them to trust physics, timing, and consequences
What She Offers / How She Complicates Things
- Technical truth, site access, a cleaner solution, and critical timing data
- Her hesitation can cost the team time
- If the team is reckless, she may decide they are as dangerous as Aztechnology
Useful line: “Their plan works. That is not the same thing as it being the right plan.”
Héctor Grimm — Cleanup Team Leader
Concept / Archetype: Corporate recovery specialist who treats violence like inventory management
Appearance & Mannerisms
- Sealed black road armor, mirrored visor, immaculate weapon handling
- Speaks little, never postures, never wastes motion
- Moves like a professional who has survived too many bad jobs by assuming everyone will lie
Motivations & Secrets
- Official mission: recover Tlaloc Black if the runners fail
- Unofficial mission: recover the cargo or eliminate anyone who knows too much
- Respects competence, but not enough to spare it
- Understands Varela is lying to everyone, including him
How to Portray
- Flat, practical, dry
- Gives warnings once
- Never sounds angry; anger would imply surprise
What He Offers / How He Complicates Things
- A rival convoy, armed pressure, and the cleanest expression of corporate betrayal
- Can be bargained with only when it benefits mission logic
- If he survives, he is an excellent recurring antagonist
Useful line: “You were hired to move it. I was hired to solve the situation after that failed.”
Brother Caim — Road Priest / Smuggler Shaman
Concept / Archetype: Weathered roadside holy man whose altar is also a logistics node
Appearance & Mannerisms
- Bare feet or old boots depending the weather, layered talismans, patched coat
- Smells of incense, diesel, and wet roots
- Speaks in plain language that becomes prophecy only after the fact
Motivations & Secrets
- Wants the road alive and the corridor usable
- Knows the spirits around the Sleeping Mouth are angry, not random
- Sees the cargo as both necessary and blasphemous
- Will help those who show respect, not those who merely pay
How to Portray
- Calm, unhurried, wry
- Treats shamans, riggers, and smugglers like different flavors of the same profession
- Never explains everything
What He Offers / How He Complicates Things
- Shrine rites, route warnings, spirit context, and hidden crossings
- Demands offerings, vows, or small acts of decency instead of simple cash
- If insulted, closes doors the runners did not know existed
Useful line: “A knife can save a life. A knife can also tell you what hand it belonged to.”
The Rain That Watches — Watershed Intelligence
Concept / Archetype: Awakened storm consciousness tied to the Sleeping Mouth
Appearance & Mannerisms
- Faces in windshield runoff
- A voice layered into thunder on corrugated roofs
- Human enough to communicate, alien enough to misunderstand human priorities
Motivations & Secrets
- Wants the breach closed without murdering the spring
- Judges choices more than promises
- Responds to rites, respect, and intention as much as magical force
How to Portray
- Brief, elliptical, unsettling but not cruel
- Speak in images: roots, pressure, thirst, silt, iron, lungs of stone
- Give answers that matter even when they are not convenient
What It Offers / How It Complicates Things
- Warnings, weather shifts, magical leverage, and the moral weight of the land itself
- Can worsen storms, make roads fail, or briefly shield the convoy
- Helps most in the ending where the runners try to save both people and place
Useful line: “You carry the bandage and the wound in the same box.”
Important Locations
1. Puerto Exilio Logistics Yard
Description & Atmosphere Rusting container stacks, muddy ruts, bad floodlights, river-barge horns in the distance. Everything smells like wet steel, cordite residue, and fuel cooked in tropical heat.
Notable Features
- Cargo prep bay under a low-grade ward
- Local logistics host with manifests, gate permissions, route data, and drone control
- Old ex-logging haulers retrofitted with shock suspension, manual override controls, and analog backups
Who / What Is Here
- Varela
- Switchback
- Contract mechanics
- Dockside gangers, lookouts, and rumor traffic
Tactical / Narrative Angles
- Last good chance to inspect, modify, or sabotage the convoy
- Good spot for legwork, bargaining, and early Matrix intrusion
- Bad place to start a loud fight unless the team wants Heat immediately
2. Gate Sable and Kilometer 27 Causeway
Description & Atmosphere A shuttered corporate checkpoint and a cracked elevated road crossing marsh and old pumping infrastructure. The jungle has started swallowing both.
Notable Features
- Sensor poles and traffic cameras still sporadically functional
- Pump-road bypass through maintenance lanes and buried pipe runs
- Flood risk, bad footing, exposed lanes, and sniper-friendly sightlines
Who / What Is Here
- Corporate holdouts or merc gate crews
- Rebel scouts
- Stranded workers or scavengers depending timing
Tactical / Narrative Angles
- Excellent early route-choice scene
- Good place to show how social, Matrix, and vehicle play all matter
- A loud solution here echoes across multiple later clocks
3. San Morado, the Ghost Village
Description & Atmosphere A roadside settlement that looks left in the middle of an argument. Doors open. Laundry stiff with old rain. A trideo flickering in an empty barber shop.
Notable Features
- Local mesh node and damaged data core in the community office
- A water tower with line of sight over most of the village
- Empty chapel, cistern, back alleys, service sheds, and a half-collapsed clinic annex
Who / What Is Here
- Maybe a few holdouts, looters, or hidden resistance observers
- Echoes of panic, evacuation, and hurried deletion
- Evidence of how San Telmo affected nearby lives
Tactical / Narrative Angles
- Best place for investigation and moral context on the route
- Strong stealth, social, Matrix, and astral scene all at once
- A good “quiet dread” location before the run gets louder
4. Jaguar Spine Bridge
Description & Atmosphere An old logging bridge spanning a ravine thick with mist, heat, and the sound of unseen water. The whole structure looks like it regrets still being alive.
Notable Features
- Narrow, one-vehicle crossing
- Maintenance shack and manual winch system
- Cable anchors, catwalk access, exposed support towers
- Brutal wind eddies when the Black Rain front moves in
Who / What Is Here
- No permanent garrison
- Ambushers, rival teams, or scouts can reach it quickly
- Air and storm spirits move through the ravine
Tactical / Narrative Angles
- Signature set piece
- Perfect for simultaneous roles in a large group
- Failure should cost equipment, time, or vehicles, not automatically end the campaign
5. Ceiba Ford, Brother Caim’s Shrine, and the Mute River
Description & Atmosphere A root-choked riverside crossing centered on a shrine built into an ancient ceiba tree. The place feels watched in a way cameras never quite capture.
Notable Features
- Hidden smuggler paths
- A possible river-barge bypass
- Small altar network, spirit marks, and offerings left by drivers, rebels, and smugglers alike
- Good shelter during short storm bursts
Who / What Is Here
- Brother Caim
- Smuggler couriers
- Rebel contacts
- Spirits that are more alert than hostile, at least initially
Tactical / Narrative Angles
- Social pivot point
- Best place to reframe the run morally and magically
- A place where the team can gain allies or shut doors
6. San Telmo PetroThaum Field
Description & Atmosphere A remote industrial site built over something it should have left alone. The main derrick burns with unnatural pressure, rain hisses on hot steel, sirens cut in and out, and everyone on-site looks two missed breaths from panic.
Notable Features
- Main wellhead and ritual lattice ring
- Worker habs and emergency shelters
- Control bunker and stripped-down emergency host
- Pipe lanes, maintenance trenches, catwalks, fuel bladders, and an evac zone
- Astrally, the place looks like a wound stitched shut with cheap wire
Who / What Is Here
- Dr. Tenorio
- Remaining workers and corporate emergency personnel
- Cleanup forces, drones, possibly rebels depending the route
- The breach itself, which is now effectively an environmental antagonist
Tactical / Narrative Angles
- Supports stealth, negotiation, open battle, Matrix intrusion, and ritual work at once
- Final decision point for the cargo
- Excellent space for a layered climax with multiple simultaneous objectives
Legwork & Intel
Legwork should never gate the plot. Missing clues should make the ending messier, not impossible. Make the broad truth available through multiple channels.
What the team can always learn somehow
By the middle of the adventure, the runners should know at least these four facts:
- The cargo is too unstable for aircraft, drones, or careless driving.
- San Telmo is tied to something awakened and older than the official map says.
- Varela is withholding part of the truth.
- Another force is likely tracking or shadowing the convoy.
Physical inspection of cargo
If they inspect the canisters in Scene 1:
- The labels do not match the weight profile.
- Internal damping systems are overbuilt, which implies shock sensitivity.
- The containers dislike active wireless power surges and nearby spellcasting.
- One canister already shows hairline stress patterns in the external ceramic.
Useful edge:
- Better handling protocols
- Early respect for Stability clock
- A reason to demand coolant, foam, or route caution
Street rumors / Smuggler contacts
If they talk to drivers, smugglers, or dock hands:
- Previous crews took one look at the route and walked.
- San Morado emptied in a hurry after the water went wrong.
- Weather around San Telmo has been “thinking strange.”
- Switchback’s route intel is excellent, but never exclusive.
Useful edge:
- Alternative approaches
- Knowledge of side objectives
- Foreshadowing for betrayal without giving it all away
Matrix searches
If they search public and gray sources:
- San Telmo was listed as a mothballed site until very recently.
- Cargo paperwork was scrubbed and rebuilt in haste.
- A hidden logistics ping suggests a second corporate team staged a few hours behind the runners.
- Local satellite coverage around the field drops out in a deliberate-looking pattern.
Useful edge:
- Grimm foreshadowed
- Evidence of corporate deceit
- Better odds on spoofing trackers later
Astral scouting / Magical investigation
If they assense the cargo or the corridor:
- Tlaloc Black radiates compressed elemental water, industrial violence, and geomantic distortion
- The road ahead carries stress like a bruise
- The village of San Morado still clings to a frightened, watchful emotional imprint
- The watershed is aware
Useful edge:
- Stronger reason to seek Brother Caim or the shrine
- The first hint that a third-way ending exists
- Early warning that brute magical force near the cargo is risky
Clues from San Morado
If they recover the data core, talk to holdouts, or search administrative ruins:
- Evacuation notices reference “nonpublic contamination”
- Water quality reports were altered before the village emptied
- An engineer memo mentions the Sleeping Mouth
- A buried appendix implies Tlaloc Black can be deployed in at least two different patterns
Useful edge:
- Proof against Aztechnology
- One required ingredient for the cleaner ending
- Moral context for the final choice
Clues from the Resistance
If they parley with Izel or her network:
- The resistance does not fully understand the cargo, but knows the site is tied to a sacred watershed
- They have spotted a second convoy or cleanup team
- They believe San Telmo can be saved without following Aztechnology’s exact plan, but they lack technical data
Useful edge:
- A safer final approach
- An alternate alliance
- A softer landing if the team turns on Varela
Clues from Dr. Tenorio
If they reach her by signal, hack the site, or contact her late in the run:
- The official plan is the fast answer, not the best answer
- There is a retuned deployment option
- It requires time, nerve, and enough data to avoid guesswork
- Varela is not authorized to decide what gets sacrificed; he is just doing it anyway
Useful edge:
- The possibility of the best ending
- Access routes and site layout
- Hard confirmation of the betrayal to come
Pressure Structure: Interlocking Clocks
This run works best with visible clocks on the table. Use markers, index cards, poker chips, or a dry-erase board.
Advance a clock by 1 for a small setback, delay, or complication. Advance it by 2 for a major failure, major detour, or loud disaster.
1. Delivery Window — 8 segments
Represents time pressure, the worsening storm front, and the shrinking chance of a clean finish.
Advance when:
- the team takes side objectives,
- spends long periods resting or repairing,
- chooses longer but safer routes,
- gets bogged down by negotiations or ambushes.
At 4:
- the Black Rain front spreads inward,
- Saint Marta Clinic closes,
- the river barge becomes less reliable,
- San Telmo starts emergency rationing.
At 6:
- Grimm deploys aggressively,
- San Telmo begins partial evacuation,
- the final site starts in worse shape.
At 8:
- the field is on the verge of uncontrolled failure,
- full pay is off the table,
- the finale begins with panic already underway.
2. Cargo Stability — 6 segments
Represents how close Tlaloc Black is to venting, rupturing, or becoming too dangerous to move conventionally.
Advance when:
- trucks crash, jump, or get hit hard,
- heavy gunfire hits near the canisters,
- active spellcasting is done too close to cargo,
- the canisters overheat,
- the team leaves obvious damage untreated.
At 3:
- black condensation beads on the shells,
- electronics near the cargo glitch,
- astral observers hear a pressure-hum.
At 5:
- one canister becomes critical,
- it must be braced, cooled, vented, or moved carefully.
At 6:
-
a canister ruptures or vents violently. Do not make this an instant campaign-ending blast. Instead choose one:
- destroy or disable one vehicle,
- crater the current route and force a detour,
- injure NPCs and spike every other clock,
- create a localized magical weather event that turns the current scene into chaos.
3. Heat / Enemy Awareness — 6 segments
Represents how many people know where the convoy is and how much attention it is drawing.
Advance when:
- the team leaves witnesses,
- goes loud at checkpoints,
- fails obvious hacks,
- trusts the wrong messenger,
- radios openly,
- or makes too much noise asking the wrong questions.
At 3:
- scouts or drones begin shadowing the convoy,
- ambush conditions improve for rivals.
At 5:
- Grimm or Izel commits to direct action,
- Switchback’s divided loyalties matter immediately.
At 6:
- all remaining interested parties converge on the route or final site.
4. Convoy Integrity — 6 segments
Represents the health of the trucks, parts, drivers, tires, improvised fixes, and the general “is this machine still a vehicle or just a determined argument with gravity?” problem.
Advance when:
- routes are rough,
- repairs are skipped,
- weather damages systems,
- the convoy overextends,
- sabotage sticks.
At 3:
- one vehicle develops a persistent issue: steering drift, cooling failure, weak suspension, damaged sensor cluster, bad brakes.
At 5:
- the team must transfer cargo, abandon a truck, or improvise a tow.
At 6:
- the convoy makes the finale on fumes, on one vehicle, or on a cursed-looking combination of spare parts and stubbornness.
5. Local Support — 4 segments, positive
This is the run’s trust meter. It represents whether the runners are still seen as hired cargo-movers or as people who might actually do the right thing when it costs them.
Fill this clock when the team:
- rescues stranded workers,
- helps Saint Marta Clinic,
- treats Brother Caim respectfully,
- bargains honestly with Izel,
- protects civilians or laborers,
- chooses not to burn every bridge they cross.
At 2:
- rebels are more willing to parley,
- a smuggler bypass or worker tunnel opens,
- the first rebel ambush can soften into a warning or conversation.
At 4:
- the best ending becomes much easier,
- locals help with evacuation,
- the Rain That Watches offers direct aid once,
- Izel or Tenorio will trust the runners at a critical moment.
How the clocks interlock
Use these links to keep pressure cascading:
- When Delivery Window hits 4 or 6, advance Cargo Stability by 1.
- When Cargo Stability hits 4, advance Heat by 1 as the cargo’s behavior becomes noticeable.
- When Convoy Integrity hits 3 or 5, advance Cargo Stability by 1.
- When Heat hits 4, advance Delivery Window by 1 due to ambushes, reroutes, and delays.
- When Local Support hits 2, the first rebel confrontation can become a parley instead of an attack.
- When Local Support hits 4, the team may ignore one major escalation in the finale because somebody decides to help.
Side-Objective Web
These are the distractions that make the road feel alive. Each offers something useful, costs time, and may expire if ignored too long. Some can be revisited later. Some are gone once the main clock rolls past them.
Saint Marta Clinic
A hidden roadside clinic serves locals, laborers, smugglers, and anyone the corps do not count.
- What it offers: Stabilizer foam and coolant packs that can erase one Cargo Stability advance later; Local Support +1
- Cost: Delivery Window +1
- Complication: The clinic wants power cells, medicine, or safe escort for one shipment
- Expires: When Delivery Window reaches 4, or after a loud checkpoint fight
- Revisit after main job: No. The clinic packs and vanishes.
Kilometer 27 Laborers
A distress beacon comes from trapped contract workers pinned under collapsed pumping infrastructure.
- What it offers: Worker witnesses, gratitude, Local Support +1, and a worker-tunnel entry option at San Telmo
- Cost: Delivery Window +1 and often Convoy Integrity +1 from rough rescue work
- Complication: Some laborers work for the site and are terrified of both rebels and Aztechnology
- Expires: When Delivery Window reaches 5, flooding or security sweeps finish the problem
- Revisit after main job: No
Relay Tower 9
An old signal tower still carries local route traffic, spoofable transponder data, and buried corp timestamps.
- What it offers: A one-use Relay Spoof tag that can erase or avoid one Heat advance; proof of Grimm’s approach; possible partial site intel
- Cost: Delivery Window +1
- Complication: Failure may increase Heat anyway
- Expires: Only if Heat reaches 5 and corp security locks it down
- Revisit after main job: Yes, unless secured first
San Morado Data Core
The village office still holds environmental records, evacuation memos, and buried engineering correspondence.
- What it offers: Village Proof; one key ingredient for the cleaner ending; leverage against Varela later
- Cost: Delivery Window +1
- Complication: The data is damaged, trapped, or partly mirrored in the mesh
- Expires: If Delivery Window reaches 6 and the site is looted, flooded, or scorched
- Revisit after main job: Yes, unless the team delivered cargo as-is and the runoff finishes the job
Brother Caim’s Shrine
A riverside altar beneath a giant ceiba tree, tended by a shaman who understands roads, weather, and debt.
- What it offers: Shrine Blessing, one-use protection against a magical complication, a path to speak with the Rain, and Local Support +1
- Cost: Delivery Window +1 plus an offering, promise, or deed
- Complication: Caim values sincerity more than money
- Expires: If the team desecrates the shrine or helps seal the spring without remorse
- Revisit after main job: Yes, unless the worst ending occurs
Smuggler Cache / Santa Dolores Barge
An old fuel barge and nearby hidden cache can open alternate movement options.
- What it offers: Fuel, spare parts, false plates, and a possible bypass or escape route
- Cost: Delivery Window +1
- Complication: Switchback’s loyalties determine whether this is a gift, a trap, or both
- Expires: The barge is lost when Delivery Window reaches 4; the land cache survives longer
- Revisit after main job: Cache yes, barge no
Rebel Parley
A chance to negotiate rather than race into an inevitable shooting war.
- What it offers: Rebel Token, safer approach to San Telmo, Local Support +1, and early truth about the Sleeping Mouth
- Cost: Delivery Window +1 and at least one honest concession
- Complication: This is not free; the runners must share something real or agree to spare workers, data, or route assets
- Expires: After the team kills multiple scouts, or Heat reaches 5
- Revisit after main job: Only if the runners did not openly side with Aztechnology
Adventure Structure: Scenes / Phases
Recommended session map
- Session 1: Scene 1 and the first half of Scene 2
- Session 2: Finish Scene 2 and run Scene 3
- Session 3: Scenes 4 and 5
- Session 4: Scene 6 and fallout
Scene 1: The Yard at Puerto Exilio
Purpose Establish tone, stakes, cargo danger, NPC agendas, and the players’ first meaningful choices.
Suggested opening
Rain hammers corrugated steel overhead. Two hulking ex-logging haulers idle under sodium lamps, their engines coughing like smokers in church. Between them sit four matte-black cargo coffins on shock-slung cradles, each ringed with coolant lines and hazard lights that blink just a fraction out of rhythm. Nobody in the yard stands closer than they absolutely have to.
Primary objectives
- Accept or negotiate the job
- Inspect the convoy and cargo
- Decide how much the runners trust Varela and Switchback
- Roll out without starting the run at maximum Heat
Optional objectives
- Improve pay or extract concessions
- Hit the yard host for hidden route or cargo data
- Arrange coolant, spare parts, or fake paperwork
- Get leads on Saint Marta Clinic, Relay Tower 9, or the trapped laborers
Key NPCs / Locations involved
- Varela
- Switchback
- Puerto Exilio Logistics Yard
- Yard host and cargo bay
Challenges & obstacles
- Varela’s briefing is truthful in the narrowest possible sense
- The cargo is visibly dangerous if examined closely
- The yard’s digital systems are guarded but not impregnable
- Contract mechanics know more than they are supposed to say
- One unseen observer may be noting plates, faces, or departure times
Multiple approaches
- Social: Squeeze Varela for better terms, manpower, route privileges, or discretion; win Switchback over; question dock hands
- Stealth: Quietly inspect cargo, plant a beacon, clone manifest data, or tail someone leaving the yard
- Matrix: Break into the logistics host to learn about the backup team, route closures, or doctored cargo labels
- Magic: Assense the cargo, check for wards, or feel the route ahead through omen or spirit work
- Vehicle / Technical: Upgrade suspension, install extra braces, analog redundancies, coolant hooks, false plates, or turret mounts
Complications
- Pushing too hard on Varela raises Heat immediately
- Mishandling a canister advances Cargo Stability
- Loud prep work warns Gate Sable or tips off route watchers
- Switchback can tell who is treating her like hired help and who is treating her like a future suspect
Fail-forward outcomes
- Failed Matrix work still reveals that the cargo is mislabeled and time-sensitive
- Failed social pressure still gets the job, but Varela marks them as a team to monitor
- Failed magical probing still tells the mage one crucial thing: this is not normal hazardous freight
GM note This scene should answer “why are we here?” and replace it with “why are we still agreeing to this?”
Scene 2: Gate Sable and the First Cut
Purpose Show that the road itself is an enemy, start the clocks moving in visible ways, and force the first route decisions.
Suggested opening
The jungle eats the road in strips. One mile is cracked asphalt, the next is roots under black water, then suddenly old painted lane markers again as if civilization remembers itself in bursts. Ahead, Gate Sable rises from the green like a forgotten threat: barrier arms, dead cameras, and just enough power left to be dangerous.
Primary objectives
- Clear Gate Sable or bypass it
- Keep the convoy moving toward San Morado
- Protect the cargo from early instability
- Decide whether to spend time helping anyone on the road
Optional objectives
- Rescue the Kilometer 27 laborers
- Reach Saint Marta Clinic before it closes
- Hit Relay Tower 9 early
- Reduce Heat before it snowballs
Key NPCs / Locations involved
- Gate Sable
- Kilometer 27 Causeway
- Stranded workers or gate crew
- Rebel scouts in observation range
Challenges & obstacles
- Gate Sable may be lightly held, automated, or “abandoned” in a way that clearly means “still watched”
- The causeway is cracked, partially flooded, and vulnerable to collapse
- Sensor poles can report the convoy if ignored
- A bad choice here can injure the convoy before the adventure has properly begun
Multiple approaches
- Social: Bluff with route papers, bribe holdouts, convince a gate crew that nobody wants to be remembered for being near this cargo
- Stealth: Slip the convoy through a pump-road bypass or under sensor blind spots
- Brute force: Smash through barriers, accept the Heat, and dare anyone to answer fast enough
- Matrix: Spoof gate permissions, blind sensors, or feed the checkpoint false convoy mass data
- Magic: Scout flood depth, test the stability of the bypass, or conceal the convoy briefly
- Vehicles: Precision drive the causeway, feather suspension, distribute load, detach and reattach trailers if needed
Complications
- A loud checkpoint breach raises Heat and Delivery Window together
- The causeway can damage a hauler badly enough to spike Convoy Integrity
- A rescue attempt at Kilometer 27 may save workers but cost precious time
- Saint Marta Clinic closes if the team dithers too long
Fail-forward outcomes
- If the gate becomes a fight, the team still gets through but the direct route worsens and San Morado becomes unavoidable
- If the causeway fails, they detour through harsher terrain and start Scene 3 with elevated Integrity pressure
- If the workers cannot all be saved, survivors still provide names, access information, or tunnel knowledge later
Quiet beat option At an abandoned weigh station after the checkpoint, let the team breathe for five minutes in character. Ask each runner one question: What is this money supposed to fix?
Scene 3: San Morado, Ghost Mile
Purpose Shift from raw road pressure to information pressure. This is the best place for investigation, moral context, side objectives, and growing mistrust.
Suggested opening
San Morado looks less looted than interrupted. Plastic chairs still sit outside a shuttered cantina. A barber pole flickers in static. Somewhere a ceiling fan turns on failing backup power, squeaking on every revolution. The whole village feels like it’s holding its breath and waiting to see what the convoy chooses to become.
Primary objectives
- Cool or stabilize the cargo
- Learn what happened to San Morado
- Decide which side opportunities are worth the time
- Keep rivals, looters, or scouts from taking control of the situation
Optional objectives
- Recover the data core
- Meet holdouts or clinic staff
- Hit Relay Tower 9 if not done earlier
- Secure fuel, water, and mechanical parts
- Build Local Support
Key NPCs / Locations involved
- San Morado village
- Data core and local mesh
- Possible holdouts, looters, or resistance scouts
- Echoes of Tenorio’s paperwork and San Telmo’s contamination trail
Challenges & obstacles
- The village can be eerie enough to make players suspicious even when not everything is a trap
- The data core may require both physical recovery and digital reconstruction
- Hidden observers may test the runners before showing themselves
- Switchback will push for movement; Izel’s people may prefer delay and conversation
Multiple approaches
- Investigation: Search records, inspect water systems, read abandoned notices, track evacuation patterns
- Social: Talk to holdouts, looters, or local contacts who stayed behind
- Matrix: Rebuild broken records, pull mirrored files, access environmental logs, or trace Varela’s edits
- Magic: Read emotional residue, placate a frightened ancestor presence, or ask the place what it remembers
- Stealth: Move through the village without tipping off watchers or rivals
- Combat: Deal with scavengers, over-eager resistance cells, or Grimm’s forward observer if someone loses discipline
Complications
- Looters may accidentally damage coolant lines or cargo restraints
- Rival spotters can tag the convoy for later
- The data core might only yield partial truth unless the decker and investigator cooperate
- Overplaying fear can make San Morado feel haunted when it is actually abandoned for painfully mundane reasons
Fail-forward outcomes
- Failed data recovery still yields enough to name the Sleeping Mouth and implicate San Telmo
- No local survivors found still means old messages, recorded notices, or environmental logs tell the same story
- If the scene goes loud, Izel can still approach later, but from a much harder position
GM note This is where the players should start realizing the job is not “corp bad, rebels good” or vice versa. It is “everybody is improvising around a crisis, and your cargo is the hinge.”
Scene 4: Jaguar Spine Bridge
Purpose Deliver the adventure’s signature set piece: a convoy crossing where every specialty matters and even success should feel expensive.
Suggested opening
The bridge emerges out of mist like an old promise nobody renewed. Two support towers lean over the ravine, cables humming in the wind. Far below, water claws at broken stone. Behind you, the jungle is starting to darken under the edge of the Black Rain front. Ahead, the only thing less trustworthy than the bridge is the idea of turning around.
Primary objectives
- Get the convoy across the ravine with as much cargo as possible
- Keep Cargo Stability below disaster
- Hold off, deceive, or survive whoever arrives mid-crossing
- Choose whether to destroy the bridge behind you
Optional objectives
- Secure or repair the maintenance winch
- Use the crossing to fake a route collapse
- Bait Grimm or resistance scouts into the wrong timing
- Save a vehicle that would otherwise be abandoned
Key NPCs / Locations involved
- Jaguar Spine Bridge
- Switchback
- Possible rebel scouts, rival spotters, or cleanup-team vanguard
- The storm front itself
Challenges & obstacles
- One-vehicle crossing under load stress
- Manual systems that may work better than powered ones
- High wind, spray, bad footing, exposed support towers
- Cargo that hates vibration, shock, and panic
Multiple approaches
- Vehicle / Engineering: Slow-crawl, counterweight, manual line handling, partial unload, or anchored tow
- Social: Radio bluff the far side, bargain for passage, or force a pause with half-truths
- Matrix: Restore bridge diagnostics, control the winch, spoof load readouts, or blind incoming drones
- Magic: Calm local air spirits, damp astral turbulence, or lend the convoy a moment of supernatural steadiness
- Combat: Cover fire against scouts or Grimm’s advance element, suppress drones, hold towers
- Stealth: Cross before contact is made, or split the team across near and far anchors to hide the convoy’s condition
Complications
- A cable frays or snaps
- One canister shifts dangerously
- The Black Rain front hits mid-crossing
- Switchback’s divided loyalties suddenly matter
- The far side is not as clear as she promised
Fail-forward outcomes
- Losing a truck is not losing the adventure. Cargo can be transferred, dragged, winched, or hand-moved under terrible conditions.
- A partial collapse can raise Delivery Window and Convoy Integrity while isolating part of the team on the far side for a tense short sequence.
- If the team destroys the bridge, they buy time from Grimm but shut off some side objectives behind them.
Large-table tip For big con tables, make this scene simultaneous:
- one or two players on vehicle control,
- one on winch and anchor,
- one on drones or Matrix,
- one on spirit/weather control,
- one on spotting and covering fire,
- one on cargo stabilization,
- one on negotiations or comms.
Scene 5: Black Rain Detour and the Choice of Allies
Purpose Turn the convoy from a mission into a moral decision. This is the pressure chamber where trust, betrayal, and the possibility of a better solution all collide.
Suggested opening
The rain starts as a stain on the horizon and becomes a wall. Black droplets hiss off hot engine blocks and run down windshields like ink. The road turns to slick clay and root. Under the ceiba tree at the ford, candles burn in old bottles despite the weather. Somebody was expecting you. More than one somebody.
Primary objectives
- Survive the storm front
- Choose the final approach to San Telmo
- Decide who the team trusts enough to share truth with
- Learn what Tlaloc Black is really going to do
Optional objectives
- Receive Brother Caim’s blessing
- Parley with Izel
- Access the smuggler cache or river bypass
- Reach Tenorio by signal
- Build enough Local Support for a cleaner ending
Key NPCs / Locations involved
- Ceiba Ford
- Brother Caim’s shrine
- Izel or her envoys
- Switchback
- Varela on comms
- The Rain That Watches
Challenges & obstacles
- Storm pressure and bad visibility
- One canister may now be unstable enough to demand immediate attention
- Varela becomes more openly controlling as the team deviates
- Grimm is close enough to matter
- Any social deal here can buy help or burn a future ally forever
Multiple approaches
- Social: Negotiate with Izel, confess partial truths, call out Switchback, secure Caim’s blessing
- Matrix: Rebuild a site link through Relay Tower 9, capture Varela’s comms, or contact Tenorio directly
- Magic: Speak with the Rain, perform a short rite at the shrine, read the storm for what route it is trying to close
- Vehicles: Take the river bypass, brute-force a jungle cut, or use the cache to swap plates and break the pursuit trail
- Combat: Fight off Grimm’s advance unit or a radical resistance cell that has decided to stop talking
What the team can learn here
- Varela’s deployment pattern will save the site and kill the spring
- A cleaner deployment exists
- It requires enough data and trust to attempt under pressure
- Grimm’s orders likely include witness cleanup
Requirements for the cleaner ending The team can attempt a lower-damage solution if it has any two of the following:
- Village Proof from San Morado
- Shrine Blessing or direct cooperation from the Rain
- Dr. Tenorio’s cooperation
- Local Support 4
Without two of those, the team can still try, but the result should be partial and riskier.
Complications
- Switchback admits she sold route fragments to multiple sides
- Varela threatens pay, future consequences, or remote site lockout
- Izel may demand proof the team is not simply stalling for Aztechnology
- The Rain offers guidance that is emotionally honest but operationally inconvenient
Fail-forward outcomes
- Failed parley still gives the team enough truth through other channels to make an informed final choice
- If the shrine is skipped or insulted, magical problems intensify but the road does not become unwinnable
- If Switchback is burned, the smuggler cache route closes, but a rougher direct approach remains
Quiet beat option This is the best place for one character-to-character trust scene:
- who they think is going to betray them,
- who they are most afraid of becoming by the end,
- and what would count as “worth it.”
Scene 6: San Telmo — Deliver, Divert, or Destroy
Purpose Bring every thread together: the convoy, the lie, the workers, the cleanup team, the rebels, the spirit, and the cost of getting paid.
Suggested opening
San Telmo burns like a refinery trying to remember it is also a shrine. Black rain streaks off catwalks and turns the floodlights into halos. Sirens pulse through static. Workers run in yellow slickers toward bunkers and vehicles that may not leave. At the center of it all, the wellhead roars under a lattice of industrial pylons and ritual housings, as if the earth itself is arguing with the machine built to pin it down.
Primary objectives
- Reach the site with enough cargo to matter
- Decide the fate of Tlaloc Black
- Keep enough people alive for the decision to mean something
- Escape whatever choice they make
Optional objectives
- Save trapped workers
- Expose Varela’s lie or dump evidence offsite
- Rescue Tenorio
- Spare or recruit Switchback
- Settle matters with Grimm
- Leave the site in a state that supports a future run
Key NPCs / Locations involved
- Dr. Tenorio
- Grimm
- Izel or her people
- Varela by comms
- The Rain That Watches
- Control bunker, ritual lattice, worker habs, maintenance tunnels, and exit routes
Site entry options
- Front gate: Fastest and loudest
- Worker tunnel: Best if the team rescued laborers or earned Local Support
- Drainage culvert: Best for stealth and small entry teams
- Pipe trestle and yard breach: Best for vehicle-heavy or combat-forward groups
Challenges & obstacles
- Panic, alarms, partial evacuation, and collapsing procedure
- Drone nets and emergency turrets
- Grimm’s team trying to secure the cargo and clean witnesses
- Rebels or locals moving on the site
- A ritual-industrial lattice that can be used, misused, or sabotaged
- Workers who are not “the corporation,” just people stuck on payroll when things went bad
Multiple approaches
- Stealth: Slip in through tunnels or culverts, secure Tenorio, plant or retune charges before a firefight starts
- Social: Convince Tenorio, stall Grimm, leverage proof against Varela, win Izel to evacuation-first cooperation
- Matrix: Shut down drones, open worker gates, falsify delivery authorization, dump data, or reconfigure the site systems for safer deployment
- Magic: Stabilize the lattice, negotiate with the Rain, ward the cargo, or shift astral pressure away from the spring
- Combat: Seize the lattice ring, hold choke points, protect Tenorio or evac routes, or fight through cleanup forces
- Vehicles: Use haulers as mobile cover, ram barriers, reposition cargo fast, and stage the final escape under pursuit
Ending path A: Deliver as briefed
The runners follow Varela’s plan.
What happens:
- The breach is collapsed quickly
- Many immediate lives are saved
- The spring is badly scarred or sealed
- Aztechnology claims a clean emergency success
Immediate consequences:
- The runners get paid, or partly paid if Varela thinks he can get away with trimming them
- Grimm may still try to silence them depending on what they learned
- Izel and locals mark them as part of the problem
- The Rain turns cold, silent, or hostile in future runs
Best use:
- For tables that want a harsh, morally compromised success
Ending path B: Retune and deliver
The runners work with Tenorio, the Rain, Izel, or the evidence they gathered to alter deployment.
What happens:
- The breach is contained
- The site may still suffer structural loss
- The spring survives in damaged but living form
- More people live, though the operation becomes much riskier in the moment
Immediate consequences:
- This is the hardest ending to pull off
- It likely involves split-scene play: holding the ring, doing the Matrix work, calming magic, moving cargo, and controlling evac at once
- Varela becomes a long-term enemy
- Izel and locals may become uneasy allies
- Tenorio may need extraction after the fact
Best use:
- For tables that like a difficult “best possible” outcome earned through side play and trust
Ending path C: Destroy or dump the cargo
The team decides the site, the corp plan, or both are unacceptable.
What happens:
- If enough workers are evacuated, the site collapses without empowering Aztechnology
- If not enough workers are evacuated, this is a bitter victory at best
- The watershed may still suffer, but not under Varela’s preferred plan
Immediate consequences:
- Aztechnology hunts the runners hard
- Izel may shield them, though not without asking future favors
- Grimm becomes a direct recurring threat
- The Rain may help them escape
Best use:
- For tables leaning anti-corp and willing to accept collateral cost
Ending path D: Hand off the cargo
The runners sell, surrender, or repurpose the cargo outside both Varela and Tenorio’s control.
What happens:
- The immediate crisis becomes messier and more political
- The site may partially fail
- The region becomes a live battleground for future runs
Immediate consequences:
- Nobody fully trusts the runners afterward
- Everybody wants to talk to them
- The campaign gets hooks for days
Best use:
- For tables that prefer open-ended fallout over clean endings
Fail-forward outcomes
- If retuning fails, allow a partial containment that saves some lives but worsens faction relations
- If the site becomes too hot, the choice can move from “what do you do calmly?” to “what do you do while escaping?”
- If all clocks are maxed out, convert the final act into triage under collapse: who gets the cargo, who gets out, and what story survives
Final escape No matter the ending, the runners should have to leave through:
- mud and rain under failing lights,
- pursuit by Grimm, drones, or rebel hardliners,
- and one last question: did they just save something, or only survive it?
Twists & Escalation
Mid-run twist
The job is both rescue mission and land grab. Varela is not lying that San Telmo must be stabilized. He is lying by omission about what will be sacrificed to make that stabilization corporate property.
Secondary betrayal
Grimm’s team is not just backup. They are contingency cleanup. If the runners become inconvenient, “recovery” changes meaning.
Switchback’s truth
Rosa sold route fragments to more than one faction. That is betrayal. It is also how she has survived the corridor this long. Whether she remains a traitor or becomes an ally depends on how the team handles her.
Optional escalation buttons
Use one or two if the table is moving too cleanly:
- One canister goes critical at the bridge instead of later
- Grimm arrives a scene early
- A radical resistance splinter attacks without Izel’s approval
- The Rain turns from warning to pressure and closes one route entirely
- Workers at San Telmo panic and flood a route the team planned to use
- Varela voids payment early to show the team their leverage is already slipping
Matrix, Magic, and Other Special Focus
Matrix set piece 1: Cenote Ledger / Relay Tower 9
A paired logistics architecture: dull on the surface, ugly underneath.
Visual / thematic feel
- Bureaucratic jade corridors, jaguar motifs, audit serpents, and weather overlays
- Clean icons on dirty infrastructure
What success can do
- Reveal Grimm’s timeline
- Spoof route transponders
- Lower or avoid Heat
- Recover altered manifests or early proof of the alternative deployment pattern
What failure does
- Flags the convoy
- Burns time
- Gives Varela or Grimm reason to tighten control
Matrix set piece 2: San Telmo Emergency Host
A stripped-down industrial host holding the site together by policy, alarms, and bad assumptions.
Visual / thematic feel
- Emergency overlays, red pressure maps, maintenance grids, worker biosigns, route locks
- Less elegant than the yard; more desperate
What success can do
- Open evac paths
- Shut down drones
- Reassign or delay cleanup teams
- Support the retuned ending
- Dump evidence to outside storage
What failure does
- Triggers lockdowns
- Narrows exit routes
- Raises Heat or Delivery pressure mid-finale
Magical element 1: Tlaloc Black
The cargo is not sentient, but it is responsive.
How to present it
- Pressure hum
- Black condensation
- Sudden static and temperature swings
- A feeling that nearby spells are being noticed
What magic can do
- Calm local turbulence
- Sense route problems before they happen
- Negotiate with the Rain or shrine spirits
- Help with the cleaner ending
What magic risks
- Spiking Stability if used carelessly near the cargo
- Making the team more visible in astral space
Magical element 2: The Shrine and the Lattice
The ceiba shrine and San Telmo’s industrial ritual ring are two ends of the same broken conversation.
What the shrine can do
- Offer blessing, warning, or access to the Rain
- Convert magic from a hazard into leverage
- Build Local Support
What the lattice can do
- Deliver Varela’s plan
- Support the cleaner plan
- Become a disaster if overloaded or sabotaged badly
Vehicles / chase focus
Vehicles are not transport here. They are the mission.
Key vehicle moments:
- delicate suspension handling at Gate Sable,
- rough-terrain strain through flood and pump roads,
- Jaguar Spine Bridge,
- the final escape out of San Telmo under pressure.
Narrative stakes for vehicle success:
- Keep cargo stable
- Keep the convoy intact
- Preserve options in the finale
Narrative stakes for vehicle failure:
- Lose time
- Force cargo transfer
- Narrow the ending
- Turn the escape into desperation instead of victory
Outcomes & Fallout
Best-case outcome
The runners achieve the retuned deployment, save most workers, preserve the spring enough for recovery, and escape with proof or leverage.
Faction shifts:
- Aztechnology: furious, embarrassed, and dangerous
- Resistance: wary respect
- Smugglers: impressed; the runners become real names on the corridor
- The Rain: no longer hostile, though not exactly grateful
Complicated success
The runners deliver the cargo, get people out, and survive, but on Varela’s terms or with only a partial correction.
Faction shifts:
- Aztechnology: pays, then manages the problem of witnesses
- Resistance: sees the runners as compromised
- Locals: saved in the short term, angry in the long term
- The Rain: wounded and watchful
Failure / partial failure
The team loses cargo, ruptures a canister, or arrives too late to control the situation cleanly.
Faction shifts:
- Aztechnology: blames the runners, whether fair or not
- Resistance: may shelter them or condemn them depending choices made on the road
- Smugglers: help only if bridges were built earlier
- The Rain: may become a full campaign problem later
Future hooks
- Extract Tenorio: she knows too much and wants out
- Grimm’s Return: he survived and now has a file with their names on it
- Village Proof: San Morado’s records could still blow open a broader scandal
- Leftover Tlaloc Black: one damaged canister or stolen sample is still missing
- Back to the Sleeping Mouth: the spring is still unstable, and someone else has arrived to exploit it
Side objectives that may remain after the main run
These can become future follow-up runs:
- Relay Tower 9 black box
- Remaining smuggler cache
- San Morado data if not recovered earlier
- Brother Caim’s shrine, unless the team chose the harshest corporate ending
Side objectives that are usually gone
- Saint Marta Clinic
- Kilometer 27 laborers
- Santa Dolores barge
- The easiest version of rebel parley
GM Tools & Tuning Knobs
Scale difficulty up or down
For an easier run:
- Start Local Support at 1
- Give the team one stabilizer pack automatically
- Delay Grimm until Scene 5 or the finale
- Let one early side objective clear Heat instead of only reducing future risk
For a harder run:
- Start Heat at 1
- Begin with one canister already unstable
- Put an actual ambush at Gate Sable
- Trigger the Black Rain front one scene earlier
- Have Varela close payment leverage sooner
Adjust for more or less combat
For more combat:
- Make Gate Sable staffed
- Add Grimm’s scouts at San Morado
- Run a live firefight at the bridge
- Let the San Telmo finale include both cleanup forces and resistance hardliners
For less combat:
- Turn most early encounters into negotiations, warnings, and bad deals
- Let rebels prefer parley over contact if Local Support is building
- Make environmental danger the main enemy and keep firefights short, brutal, and meaningful
Tighten or loosen pacing
For a tighter 4-session structure:
- Advance Delivery Window by 1 at the end of each major scene
- Keep side objectives to one major choice per session
- Use bridge crossing and San Telmo as hard cliffhangers
For a looser version:
- Let San Morado breathe
- Add campfire or roadside roleplay beats
- Make Switchback, Izel, and Tenorio more relational before the final choice
Running this for 3–10 players
For 3–4 players:
- Use one main hauler and one escort/support vehicle
- Fold some side objectives together
- Give one NPC mechanic or driver who can be put at risk
For 5–7 players:
- Run the adventure as written
- Two haulers and one escort vehicle work well
For 8–10 players:
- Split jobs explicitly: lead driver, tail driver, cargo handler, mechanic, decker, mage, negotiator, scout, overwatch, rear guard
- Use simultaneous tasks at the bridge and San Telmo
- Let some players handle NPC allies, evac groups, or secondary vehicles during the finale
Reusing NPCs and locations
- Varela works as a recurring polished enemy
- Grimm is a strong long-term hunter or reluctant future ally against worse corporate actors
- Switchback can recur as fixer, betrayer, or both
- Izel can anchor future resistance runs
- San Morado is excellent for aftermath missions
- Brother Caim’s shrine is a perfect recurring magical crossroads
Most important GM principle
Do not let one bad roll end the story. Let bad rolls:
- cost time,
- damage vehicles,
- spike Stability,
- burn allies,
- harden the ending,
- or force uglier choices.
But keep the convoy moving.
The point of this adventure is not whether the runners avoid pressure. It is whether pressure tells them who they are before the road ends.